Related Posts Plugin for WordPress, Blogger...

Monday 31 July 2017

Floral Dancer.


Good morning friends and visitors, my card today I`m sharing from Poppystamps blog ..

birthday card I made for a sweet girl who loves dancing.. 


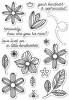
I have tried to make the "Floral Dancer" look like she is on a stage..


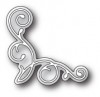
This is how I started my card.. on the left  you can see the frame I made with my die placed for cutting..right  after cutting in my die cutting machine.


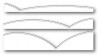
This is the main card..I have cut and scored two concertina strips, these will be attached with glue to either side of this card.. right as shown.


Background for the dancer, using distress oxide ink and clear embossing so it looks light shiny lights.


Silver curtains made using "Stitched Hills" Pink embroidery thread for tie backs..  adhered to the card sides of the dancer cut and adhered in the middle section of the concertina..


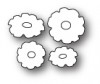
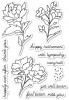
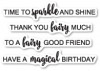
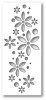
Next I adhere the frame to the left and right concertina sides, finished with "Happy Birthday Melody"  "Angwin Corner with "Blooming Blossoms"  flowers.
Decorations Liquid Pearlescent and gems ..


Thank you for stopping by Pam x.


Friday 21 July 2017

First Christmas Cards 2017.


Good morning friends and visitors.. hope you have the sunny weather with you today! great washing drying day with this wind..


These are my first Christmas cards this year  2017.. 3D Christmas Embossing folders..


Three cards using Two 5"x7" Embossing Folders.."Pretty Poinsettia Frame" & "Holly & Ivy" 


Holly & Ivy..


I have made these 3 frames the same..Spellbinders Grand Rectangle for the white and spellbinder with Crea-Nest-Lies XXL Stitched Rectangles for the red! as this made a perfect size frame for these folders.

I added colour with Distress Markers..Dress My Craft  "Sparkling Dust"
Nuvo Crystal Drops Gloss White..few random dots.


Pretty Poinsettia..

These next two card have been made the same..
I have embossed two folders for each card!!! 
Cut the two flower designs away and layered onto the main embossed card for dimensions


I have used my Distress Markers in red and green..just in the debossed area of the Poinsettias, I did`nt want heavy red colour on them!! Not sure if I like or not...

Yvonne Creations...Merry Christmas ..here  

Centre of the three cards..  7.1/2" x 6" finished card size.


Thank you for stopping by today...Pam x


Thursday 20 July 2017

Little Kindness.


Good morning friends and visitors.

Sharing my DT post from over on Poppystamps Blog  today.
My card using these new Poppystamps "Little Kindness" clear stamps and matching die set.


I have used heat embossable  Velum, clear Veramark ink pad, with "Stamp N Stuff"  Winter Wonderland embossing powder..Wish you could see the sparkle on these flowers and leaves.


Sentiment from the stamp set, wow white embossing powder.


How I used my Misti for the placement of these stamps.


Showing you how these new "Pointed Oval Frames"  cut...I decided not to use this white and went with blue..(said before I tend to change my mind).. oval placed in the centre of a 6" square.


This is the card that has been die cut in my die cutting machine..Love the way these New Poppystamp Frames give you three possibilities to use on your projects..


I used just the white frame on my project.


"Delicate Stitches" make  lovely detail around your card, as they do not have a cutting edge! so can be placed anywhere you decide to use them.    


I have used "Butterfly Sprinkles"...Novo Jewel Drops around the border and in the oval, flowers I used some gems.

Thank you for stopping by today..Pam xx

Poppystamps
Delicate Stitches   here
Heart screen   here
Butterfly Sprinkles.  


Wednesday 12 July 2017

Peony Stems and Blossoms.


Good morning, friends and visitors.. sharing my card from over on Poppystamps Blog  today.

  I love flowers..Have you seen these beautiful "Peony Stems and Blossoms Stamps and Die set"
from the New Holiday 2017 Release from Poppystamps..


I have stamped these two flower sprays in versamark clear ink, then sprinkled white embossing powder over and heat embossed with my glue gun, next I used the matching dies to cut in my die cutting machine.


These Peony`s have been coloured with my Pro Marker pens.. I have added some background shading with Distress Ink Bundled Sage, the random dots are in the stamp set.
I foam taped these flowers, onto an Open Studio "Stitched Oval"


This is the Stitched oval you can see in the background with scallops..... I die cut "Pretty Stitches" snipped with scissors so it will go around a curve, adhered with strong sticky tape..


Finished with Bow... butterfly sprinkles...gems.. Sentiment from "Fairy Greetings" CL452 clear stamps.  5.1/2" x 7" card size.

Thank you for stopping by  Pam x.


Wednesday 5 July 2017

On Your Christening Day.


Good morning friends and visitors. 
Quick post from me today..I made this Christening card a few weeks ago. 

Very similar to an early card design.


Main card I have used Creative Expressions  "Noble Pierced Squares" 
Border peeking either side Poppystamps.."Eyelet Stitches" 
Background card.. Memory Box.. "Starlit Breeze" 
Bottom half I have embossed in a folder stars.

Sue Wilson "On Your Christening Day"
The mats for this are from a Tattered Lace "Oval Shutter Card" die set. same for these Bootees.. 


Love the cute Baby Bootees by Serendipity, you get the outline and solid background dies with this cute bow. I threaded ribbon threw the eyelet holes. 


Finished with glitter and gems..

Items used..
Tattered Lace..Oval Shutter card dies.
Creative Expression..for Sue Wilson.. Noble Pierced squares.
On Your Christening Day.
Serendipity..Baby Bootees..
Memory Box..Starlit Breeze.here
Poppystamps. Eyelet Stitches..  

Thank you for stopping by today..Pam x


Saturday 1 July 2017

Just Bling It.


Good morning friends and visitors..

1st of the month that means .........

New Challenge over on Poppystamps Challenge Blog.


PSC#34 Just Bling It.. 


(Where did last month go!!!)

I have used Martha Stewart Glitter as my bling with a few iridescent gems .. 


I first got this idea to use "Glitter Inlay Technique" after watching  Dave`s video  ..
Dave Brethauer ..  Memory Box ..  here   
Great way to add sparkly.


I first adhered  double sided sticky sheet onto white card..remove the backing from the sheet, put aside.
Next I have cut  Poppystamps "Floribunda Collage die"  with white card.
Attached this to the sticky sheet on your put aside card.
I added one colour  Martha Stewart Glitter at a time (4 colours altogether) till my pattern was complete. 

I next added a purple card mat..
Next put strips on strong red tape on the reverse to add my ribbon as shown. this bow I tied with my Zutter Bow It All. leaving tails to adhere around the card corner.


I have done the same technique on my Poppystamps "Devyn" & "Emelia" Butterflies.. 

Sentiment from my stash and   "To Your Next Chapter" which is from "Sentiments Of Hello CL451" by Poppystamps. Using Encore Metallic Ink Enchanted Evening..


Main card Shape ..Tattered Lace "Tri Fold" card set

I have finished with a few gems and pearl hearts.

Hope I have given you some ideas and you`ll join us over on Poppystamps challenge Blog with your card designs..Details are here and of course there`s a prize for the winner.


Thank you for stopping by Pam  xxx.