Related Posts Plugin for WordPress, Blogger...

Wednesday 31 August 2016

Elegant Pumpkins..


Good morning friends, followers and visitors..

Sharing my DT card from Tutti Designs blog  

This is my first "Fall" card that I have every made! It is something we do not celebrate in the UK as you do in US.


I cut this corner in cream card using "Elegant Pumpkins" ..on the reverse, before the negative pieces fell out ..I used super sticky double sided tape to hold them in place.
Next using distress markers in orange shades I coloured as shown, the leaf with swirl a mix of green pens.


To add dimension I used 3d foam tape behind  the pumpkins only, placed these onto brown card that has been embossed in a folder with leaves.. 
Next using glossy accent on the coloured orange only, hope you can see the shine!
Using watered down white Gesso added splatters..  

The leaves and text with folder I got FREE with Creative Magazine.. best freebie for a long while..
Cut leaves in greeny yellow card and coloured with distress inks!

Thank you for stopping by and any comments you care to leave Pam x.

Tutti Designs Elegant Pumpkins.  oysterstamps


Monday 29 August 2016

Poinsettia birthday card.


Good morning Friends, followers and visitors, as I writ this blog post up (Friday), we have a hot sunny day!!! but looks like we have changes on the way typical UK Bank Holiday Weather Rain..

Sharing my card from  Poppystamps blog  

Birthday card using  these New Stamps & matching Dies from Poppystamps
"Poinsettia Peace" Clear stamps CL 440 & Matching Die.


I do not think Poinsettias are just for Christmas!! hope you agree..


 In the floral arrangement I have used Poppystamps "Small posh outline" .
If you need to know how I made these flowers..details are on the  Poppystamps blog Here.


Item used.
Poppystamps.
New Poinsettia Peace CL440 & Poinsettia Die.
Hope & Thanks CL405  (Birthday sentiment).
Classic Ribbons. 
Hampstead Oval frame.  here
Small Posh Outline.

Sue Wilson.
Noble Pinpoint Rectangles
Double Pierced Ovals.

Thank you or stopping by today...enjoy your Bank Holiday Monday! Pam x

Wednesday 24 August 2016

Loaded Sleigh.


Good morning friends, followers and visitors..

This is my DT card over on Tutti designs Blog.

I have used the  Loaded Sleigh 125  .


I added more parcels to the "Sleigh" these were cut with Fancy papers!!  Bow detail Glue pen and silver glitter, I did the same too the Sleigh! 


Background I dry embossed in a folder, this was shaded with Distress Marker "Shabby Shutters.
Couple of sentiments from my stash, Gifts Galore & Christmas Wishes on a tag with some flowers again cut with paper..

Hope you like these traditional colours on this card..

Items used

Tutti Designs.
Loaded Sleigh 125.  Oyster Paper Crafts
Crea-nest-lies.. xxl Rectangles.  Oyster paper Crafts
Poppystamps.
Small Blooming poinsettia.
Tags.
Distress marker. Shabby Shutters.
Lily Valley Sentiments.
embossing folder from stash.

Thank you for stopping by my blog and any comments you care to leave..Pam x


Tuesday 23 August 2016

Poppystamps & Birch Press Designs Blog Hop!


Good morning everyone.
We are holding a blog hop! Great Prize for one Lucky Hopper! 
$25 Gift Certificate.. 


We want you to know we think you're all winners - so we're offering FREE SHIPPING (USA only)  on all die orders from Birch Press Design.  What a great time to try out these new dies! You can see all the layered dies here.
Poppystamps.com is having a special sale for you too! You can also enter the code "FRESH" at Poppystamps for an additional 20% items already on sale (go to the SUMMER SALE page to see the great deals)!   Click here to go shopping!  As a bonus, free shipping on poppystamps orders from August 23 through Aug 28!


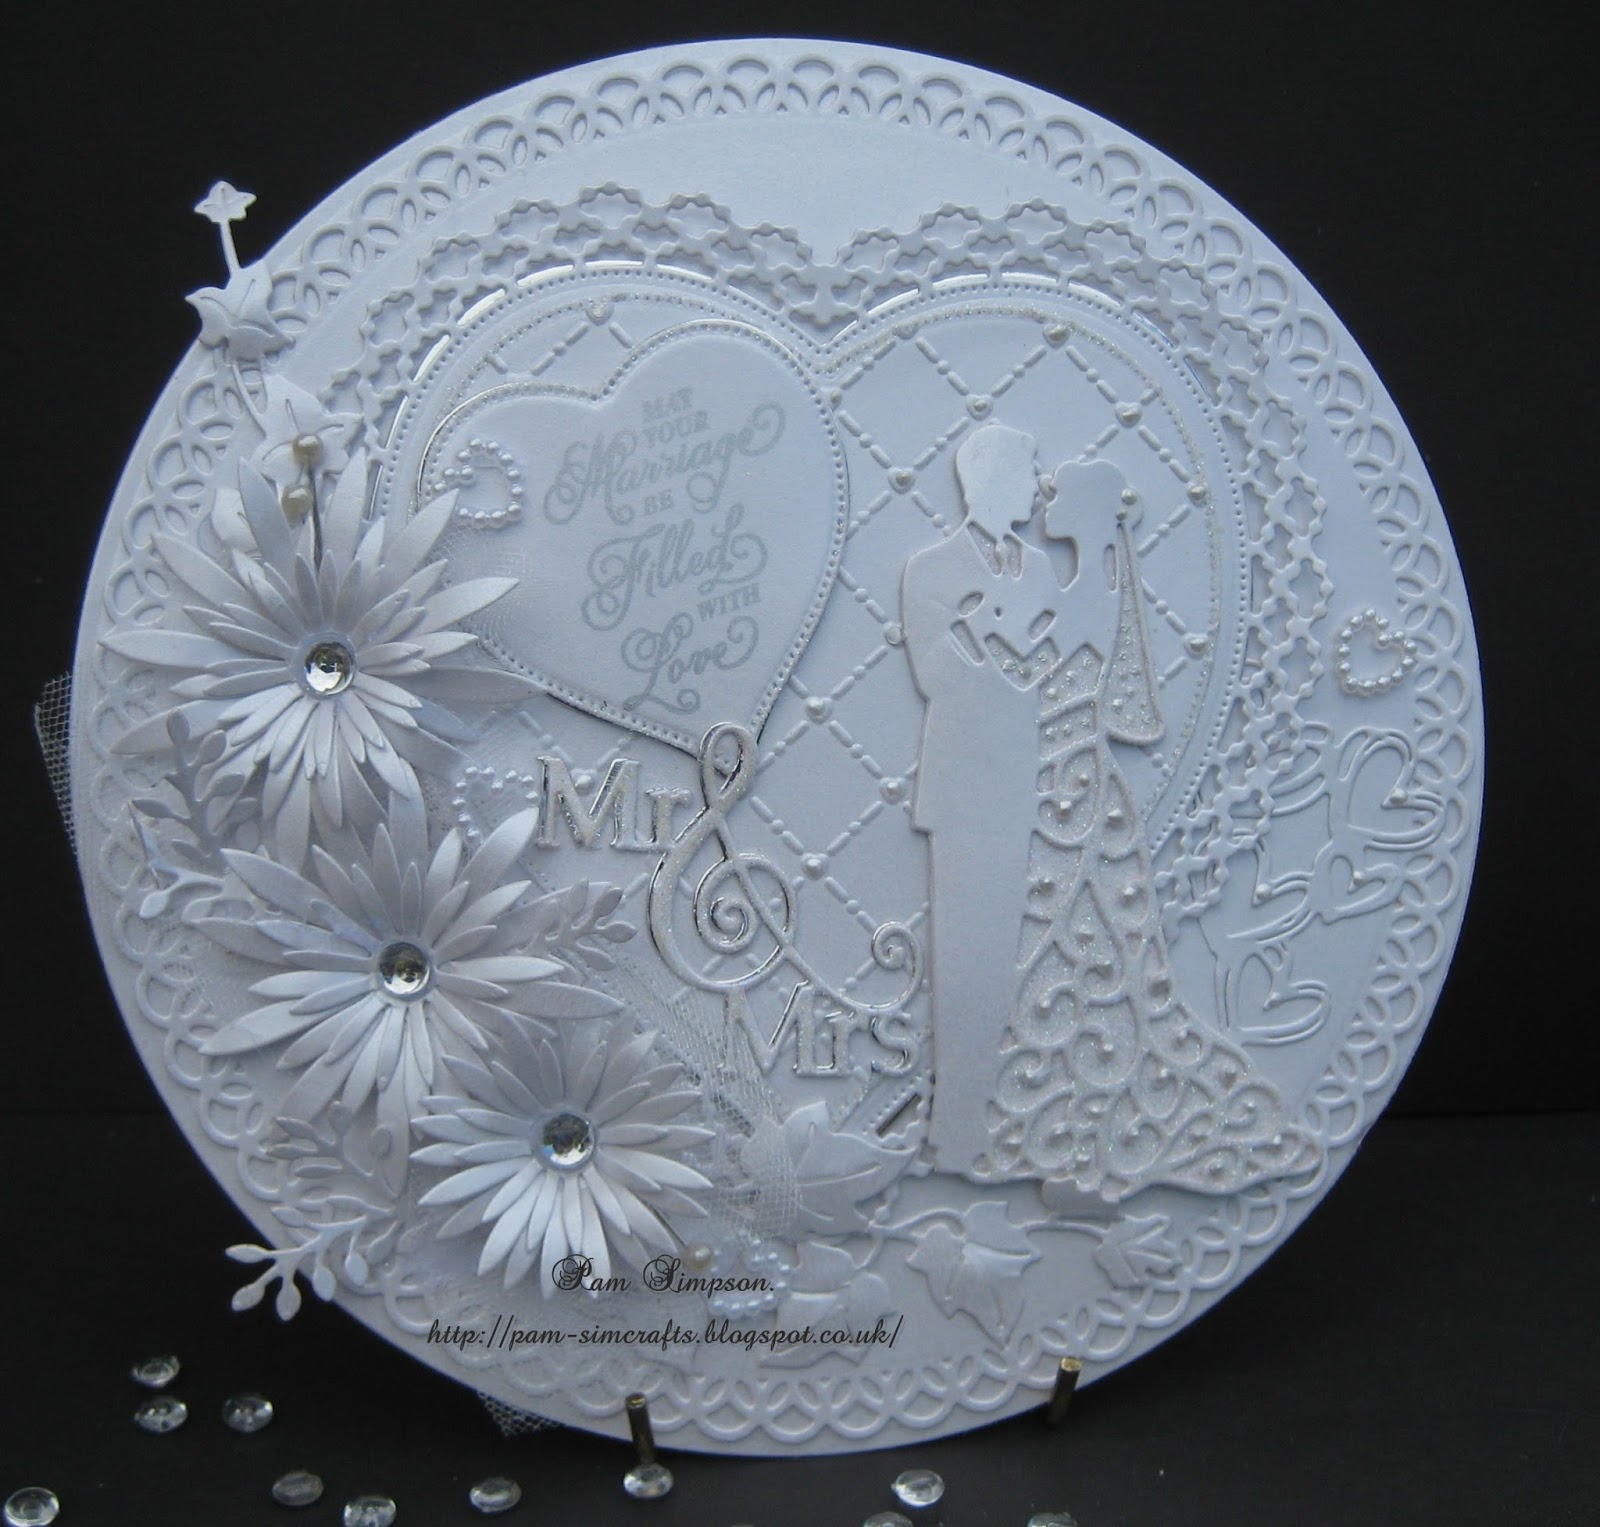
This Gorgeous set of Dazzle background dies are from  
 Birch press designs.  they can be stacked as I have or used on there own!  


My card I created using these Dazzle Background Stackables..
With Poppystamps Dies & Paper Pad. 

How too..
I cut the stackables in cream card adhered together with pva glue.
I placed my picture (free image) so I could  view in the cutout circle..next I place onto a patterned paper, from Dove craft. Floral Muse paper pad (love this collection)..

Using spellbinders Grand Rectangles I cut two frames..out side the same size..inner one smaller! as I wanted to sandwich in-between this pretty border,. Memory Box..Open Studio.. Country Borders.  I cut four adhered as shown. 
Thought I would make a Rosette for a change.. 
How Too..
1" x 8" strip paper.. cut the one edge  with Country Border die. you`ll have to move along the strip but matches perfect! using a score board "Score in between the points"..
Next concertina fold..glue ends together. cut small circle..I used hot glue..on this circle push your plain concertina onto this to form a Rosette..


Tiny flowers ..Poppystamps Small Blooming Poinsettia.. with Hampstead Stem.
Stamp from my stash.. New Poppystamps.. Festival Tags.. 
Finished Card 6.1/2" x 8"..
Pearls from my stash.

If you would like to play along on the Hop!   you`ll need to visit all on the list and leave a comment..by 27th August!  detail also here.. http://poppystamps.typepad.com/


You are here!!!


Thank you for stopping by, have a wonderful day! pam x


Item used.
Spellbinders Grand Rectangles (retired).
Birch Press Designs Dazzle Background dies.Oysterstamps 

M/B. open Studio. Country Borders.
Poppystamps.
Small Bloomimg poinsettia.
Hampstead Stem.here
Festival Tags.
Dove craft. Floral Muse Collection.
Pearls/stamp. stash.  

Friday 19 August 2016

To A Special Couple. Wedding Day


Good afternoon friends, followers and visitors..Rain today here...

Warm Welcome to new followers, thank you for joining my blog. 


Sharing this Wedding card I made in July.. I have not meet the couple myself only the Brides lovely Mum.. I do know  they they had a wonderful sunny day for their open air Wedding..


No colour in the design as  Mum said just Oyster colour only for there Daughters Wedding .. when I asked in conversation as you do lol. I did find it hard  not to add any!!!


Sue Wilson.."The Happy Couple" die.
No backing with this die, I cut around with scissors after layering onto card, added glitter  and liquid pearls. 


One of my all time favourite dies.."Heartfelt Creations" Delicate Asters..Mix of SW Ivy/delicate fronds.
Sue Wilson  "Mr & Mrs" die. shadow onto silver mirri card. Sentiment.
Justrite
 "Wedding Inner Thoughts" stamped in Silver Encore ink. onto Tattered lace Pinpoint Heart.


Main card shape. Spellbinders Grand Circle with Decorative Circle Retired dies..
Tattered lace Pearl Hearts & Pinpoint heart, embossed in Sue Wilson "Lattice Heart" A4 embossing folder.. T/L Tuck in Hearts behind the Couple..


Thank you for stopping by today, enjoy your weekend.  Pam

Wednesday 17 August 2016

Jolly Snowman Scene.


Good morning everyone.
Can you believe I`m still making Christmas cards! in this scorching heat here in the UK.

To-days card I am sharing from over on  Tutti designs Blog  it is my Wednesday DT post.


Don`t you just love this Jolly Snowman from Tutti Designs  


I have used these three Tutti Designs dies on this card. 


Jolly Snowman 137.. Tutti Designs..Snowglobe Expressions143...Tutti Designs..Tree Of Life115..Tutti Designs.

This Tree Of Life..I removed butterflies and birds from the die cut!

Joy from Snowglobe Expressions.. Shadowed in Red card.


There is no background with this die, I adhered to white card I had added glitter to, cut around with scissors..Hat I paper pieced in black card..holly green glitter with some pearls.
Scarf coloured with red pen and glittered with red, nose in orange..eyes and mouth I used permanent black pen..

Thank you for stopping by today and any comments you leave..Pam x

Items used.
Tutti Designs..
Jolly Snowman 137.  oysterstamps
Snowglobe expressions. 143 oysterstamps
Tree of life. 115.           oysterstamps
Poppystamps landscapes.
Cardinals.
Sue wilson ..Noble Rectangles pinpoint 


Wednesday 10 August 2016

Christmas Ringing Bells.


Good morning everyone,  sharing my DT project.. Christmas card using this beautiful die.


Main card colour is cream.. 


I have cut these bells in cream card. then adhered just the bell to gold Mirri card, cut around. using double sided foam tape to raise these bells for dimension.


                                                                                        Foliage under the ribbon, one of                                                                                        my favorite Tutti dies   "Arched Fir Branch" 123.      


This Ringing Bells die would make Gorgeous Wedding/Anniversary cards too..

Thank you for stopping by today. and any comments you care to leave..Pam x

Items used to make this card.
Tutti Designs.
Ringing Bells 141.    Oyster stamps
Arched Fir branch 123.   Oysterstamps
Ecstasy crafts. Dazzling Sun Burst. embossing folder.
Anna griffin Christmas Stamps.
Perlen-pen Viva gold.
Stickles Xmas Red.
Spellbinds Grand Large lables.

Sunday 7 August 2016

Merry Christmas Circle Frame.


Good morning friends, followers and visitors..
Quick make Christmas card I`m sharing today using the New July Release from.


Two colours, white & red.  I have used dies from the new July release, cut one in white card "Merry Christmas Circle Frame"  next place a red card piece across the words Merry Christmas! cut away any of the frame,  using just the wording adhere to the White wording to create a shadow. this I adhered to a white die cut circle.
Next I used from Memory Box..Open Studio. "Stitched Scalloped Circle" cut one in red card. 


Cut and shape white three times. red once.. these gorgeous Stitched Poinsettias Trio.. I used pva glue in the centers to layer up as shown, these were arrange on around the circle with "Holly Leaf Branch"  red gems  to add sparkle in the centers. few pearl pins. 


Single Poinsettia with a Holly spray at the top right. 


Finished card placed on my circles 6.1/2" .. top opener. .. I will make more of this card design as it`s so quick.  

Thank you for stopping by & any comments you care to leave..Pam x


Items used.

Poppystamps dies.
Merry Christmas Circle Frame.  
Stitched Poinsettia Trio.
Holly Leaf Branch.       here
Memory Box..Open Studio.. Stitched Scalloed Circles.
 Sue Wilson. Noble Double Pierced Circles.


Wednesday 3 August 2016

Snow Globe Scene.


Good morning friends, followers and visitors. 

It`s Wednesday so I am blogging over on  Tutti Designs Blog  


I have made this  Christmas card using this wonderful   Snow Globe Scene Die 145 


This die cuts as the picture, I have pieced  the die cuts back into the globe shape. after I cut a circle shape in dark blue as a backer.


I have coloured these pieces with distress markers, then using pva glue I added  lines to create snow, while still wet applied "Twinklets Diamond Dust" 

The bottom of the Globe I cut a silver frame,  pieced dark blue into this, next using "Glossy Accents" on the blue to create a glass look, sorry it does not show up in the photo..


This embossed background was a free embossing folder from a magazine. 
It has a circle shape in the centre, I die cut a dark blue card circle shape.
Finished with red ribbon, leaves by Sue Wilson Trailing Ivy Dies
from my stash and berries..
Hope this has given you an idea how to use this wonderful Snow Globe Scene, would look beautiful in traditional Christmas colours.


Thank you for stopping by  and any comments you care to leave...Pam x.  


Items used.

Tutti Designs.
Snow Globe Scene 145.  here Oyster Stamps    
 Memory box Joy.
Sue Wilson. Trailing Ivy.
Free magazine embossing folder.
Twinklets Diamond Dust.
Distress Markers